Build a product site from one folder
Build a product website with a landing page, pricing page, docs, blog and changelog from one folder of Markdown and HTML, and publish it with Flowershow.
Give it this page as Markdown: https://flowershow.app/docs/guides/build-a-product-site.md. For all of Flowershow, point it at https://flowershow.app/llms.txt, or install the Flowershow skill: tell your agent "Install the Flowershow skill from https://raw.githubusercontent.com/flowershow/skills/main/SKILL.md" (or see Skills).
You're launching a product and need the usual site: a landing page, a pricing page, docs, a blog and a changelog. With Flowershow all five live in one folder of files, and one publish puts them online.
What you'll build
A site for an example product, Tidyform, with five sections and a menu linking them:
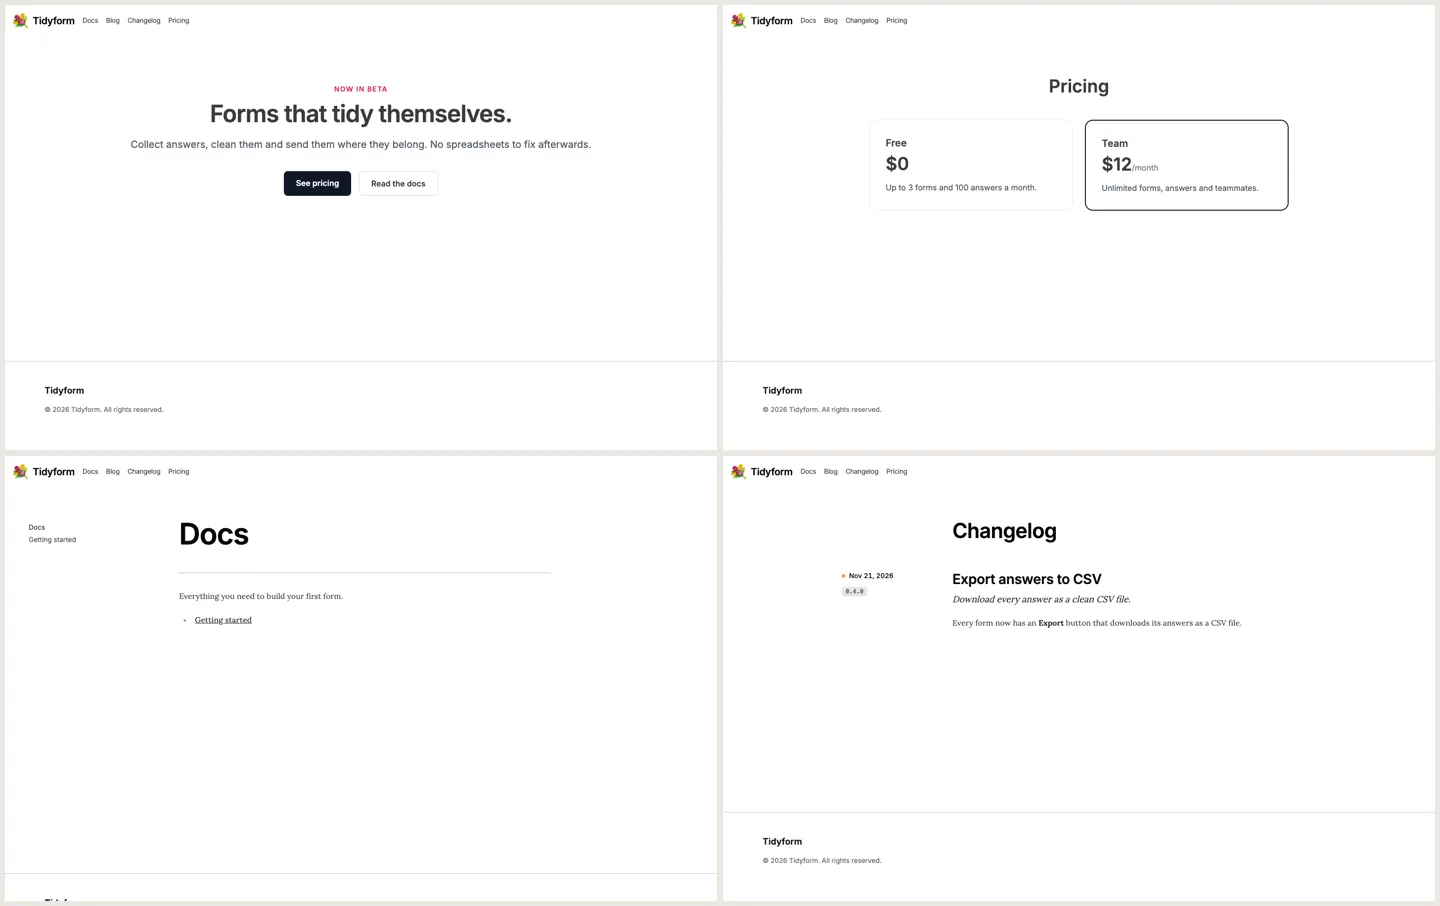
You'll learn which file or folder makes each section, and how to design pages in HTML with layout: plain. flowershow.app is built the same way: its source is in content/flowershow-app on GitHub.
You'll need: an empty folder on your computer, and the fl command-line tool (see Publish from the terminal) or a GitHub repo connected to Flowershow (then push instead of running fl .). Time: about 15 minutes.
The finished folder:
tidyform/
├── README.md          # landing page
├── pricing.md         # pricing page
├── config.json        # menu and sidebar
├── docs/
│   ├── README.md
│   └── getting-started.md
├── blog/
│   └── 2026-11-20-why-we-built-tidyform.md
└── changelog/
    └── 2026-11-21-export-to-csv.md
Step 1: Write the landing page
Create README.md at the top of the folder. README.md (or index.md) is your home page. layout: plain gives you a blank full-width page between the navbar and footer, and you design it with HTML and Tailwind classes:
---
title: Tidyform
description: Forms that tidy themselves. Collect answers, clean them and send them where they belong.
layout: plain
showToc: false
---

<section className="max-w-5xl mx-auto px-6 py-24 text-center">
  <p className="text-sm font-semibold uppercase tracking-widest text-rose-600">Now in beta</p>
  <h1 className="mt-4 text-5xl font-bold tracking-tight">Forms that tidy themselves.</h1>
  <p className="mt-6 text-xl text-gray-600">Collect answers, clean them and send them where they belong. No spreadsheets to fix afterwards.</p>
  <div className="mt-10 flex justify-center gap-4">
    <a href="/pricing" className="rounded-lg bg-gray-900 px-6 py-3 font-semibold text-white">See pricing</a>
    <a href="/docs" className="rounded-lg border border-gray-300 px-6 py-3 font-semibold">Read the docs</a>
  </div>
</section>
Use className for classes: it works in both .md and .mdx pages. Then publish the folder:
fl .
The first time, fl asks you to confirm the new site's name. You should see a link to your new site. Open it: the headline, the line under it and the two buttons, centered on the page.
Step 2: Add a pricing page
Create pricing.md beside it, again with layout: plain:
---
title: Pricing
layout: plain
showToc: false
---

<section className="max-w-4xl mx-auto px-6 py-20">
  <h1 className="text-4xl font-bold text-center">Pricing</h1>
  <div className="mt-12 grid gap-6 md:grid-cols-2">
    <div className="rounded-2xl border border-gray-200 p-8">
      <h2 className="text-xl font-semibold">Free</h2>
      <p className="mt-2 text-4xl font-bold">$0</p>
      <p className="mt-4 text-gray-600">Up to 3 forms and 100 answers a month.</p>
    </div>
    <div className="rounded-2xl border-2 border-gray-900 p-8">
      <h2 className="text-xl font-semibold">Team</h2>
      <p className="mt-2 text-4xl font-bold">$12<span className="text-base font-normal text-gray-500">/month</span></p>
      <p className="mt-4 text-gray-600">Unlimited forms, answers and teammates.</p>
    </div>
  </div>
</section>
Publish again with fl .. You should see two plan cards side by side at /pricing (stacked on a phone).
Step 3: Add the docs
Create a docs folder with an intro page, docs/README.md:
---
title: Docs
---
Everything you need to build your first form.
- [[getting-startedGetting started]]
and a first docs page, docs/getting-started.md:
---
title: Getting started
---

Create a form, share its link and watch the answers arrive, already cleaned.

## Create a form

Click **New form**, add your questions and press **Publish**.
These are ordinary Markdown pages: no layout: plain, so they get your theme's typography. Publish, then open /docs. You should see the intro page with a sidebar listing "Getting started".
Step 4: Add a blog and a changelog
Create blog/2026-11-20-why-we-built-tidyform.md:
---
title: Why we built Tidyform
date: 2026-11-20
description: Every survey we ran ended in an afternoon of spreadsheet cleaning. So we fixed that.
---

Every survey we ran ended in an afternoon of spreadsheet cleaning. So we fixed that.
and changelog/2026-11-21-export-to-csv.md:
---
title: Export answers to CSV
date: 2026-11-21
version: 0.4.0
description: Download every answer as a clean CSV file.
---

Every form now has an **Export** button that downloads its answers as a CSV file.
You don't write an index page for either folder. A folder named blog lists its own posts, and a folder named changelog becomes a timeline. Publish, then open /blog and /changelog. You should see the post in a list, and the update in a timeline with its date and the 0.4.0 version label.
Step 5: Add the menu and limit the sidebar
Create config.json at the top of the folder:
{
  "siteName": "Tidyform",
  "nav": {
    "title": "Tidyform",
    "links": [
      { "href": "/docs", "name": "Docs" },
      { "href": "/blog", "name": "Blog" },
      { "href": "/changelog", "name": "Changelog" },
      { "href": "/pricing", "name": "Pricing" }
    ]
  },
  "sidebar": {
    "paths": ["/docs"]
  }
}
nav sets the title and links in the navbar. The sidebar is on across the whole site by default; sidebar.paths keeps it to pages under /docs. siteName is the name in the footer. Publish once more. You should see "Tidyform" and the four links at the top of every page, and the sidebar only on the docs pages.
That's the whole product site. Every later change is the same loop: edit a file, publish.
Troubleshooting
- The landing page shows raw HTML or an MDX error → check that every tag is closed (
<br />, not<br>) and that attributes useclassName. See Debug MDX errors. - A Tailwind class has no effect → check the class name against the Tailwind docs. For styles Tailwind can't express, write them in a
custom.cssfile at the top of the folder (see Custom styles). - The sidebar still shows on the blog or changelog →
sidebar.pathsmust be insideconfig.jsonat the top of the published folder, with paths that start with/. To hide it on one page only, addshowSidebar: falseto that page's frontmatter. - The blog shows no posts → the folder must be named
blogorposts. If you added ablog/README.mdwith its ownlayoutorlist: false, the automatic list is off. See Listing pages.
Next steps
- Put it on your own domain (Premium): Custom domain.
- Turn on full-text search for the docs and blog (Premium): see pricing.
- Colors and fonts for the whole site in one
custom.css: Custom styles and Custom fonts. - Footer columns and social links: Footer.
- Your own navbar and footer HTML (Premium): Custom navbar and footer.
- Publish from a GitHub repo so every push updates the site: Publish a GitHub repo.
- More changelog options (a single
CHANGELOG.md, authors, images): Changelog. - More blog views (grid, magazine, featured post): Listing pages.
- The full range of website features: Websites.
