Publishing a Blog
A complete guide to setting up a blog on Flowershow — create a blog section, configure the home page, add authors and navigation, and apply themes.
This guide walks you through the process of adding a blog to your Flowershow site.
You’ll learn how to create a dedicated blog section, set up a landing page that lists your posts, attribute content to authors, embed a subscription form, and apply a theme.
Before you begin, make sure you have a Flowershow site set up.
In the video tutorial, I’m using Obsidian connected to GitHub via the Flowershow Obsidian plugin, and the site is already published with Flowershow.
However, you can use any markdown editor, or even edit files directly in the GitHub web interface — Flowershow works the same way.
🎥 Watch the full video tutorial:
We're going to start with a very basic Flowershow site, with just a README.md file:
---
title: Add a Blog Section to Your Flowershow Site
description: This is a simple starting point for the tutorial.
image: "[[hero.png]]"
showHero: true
showToc: false
---

## 👋 Hey there!

This is a minimal homepage I’ll start from in today’s tutorial.

...
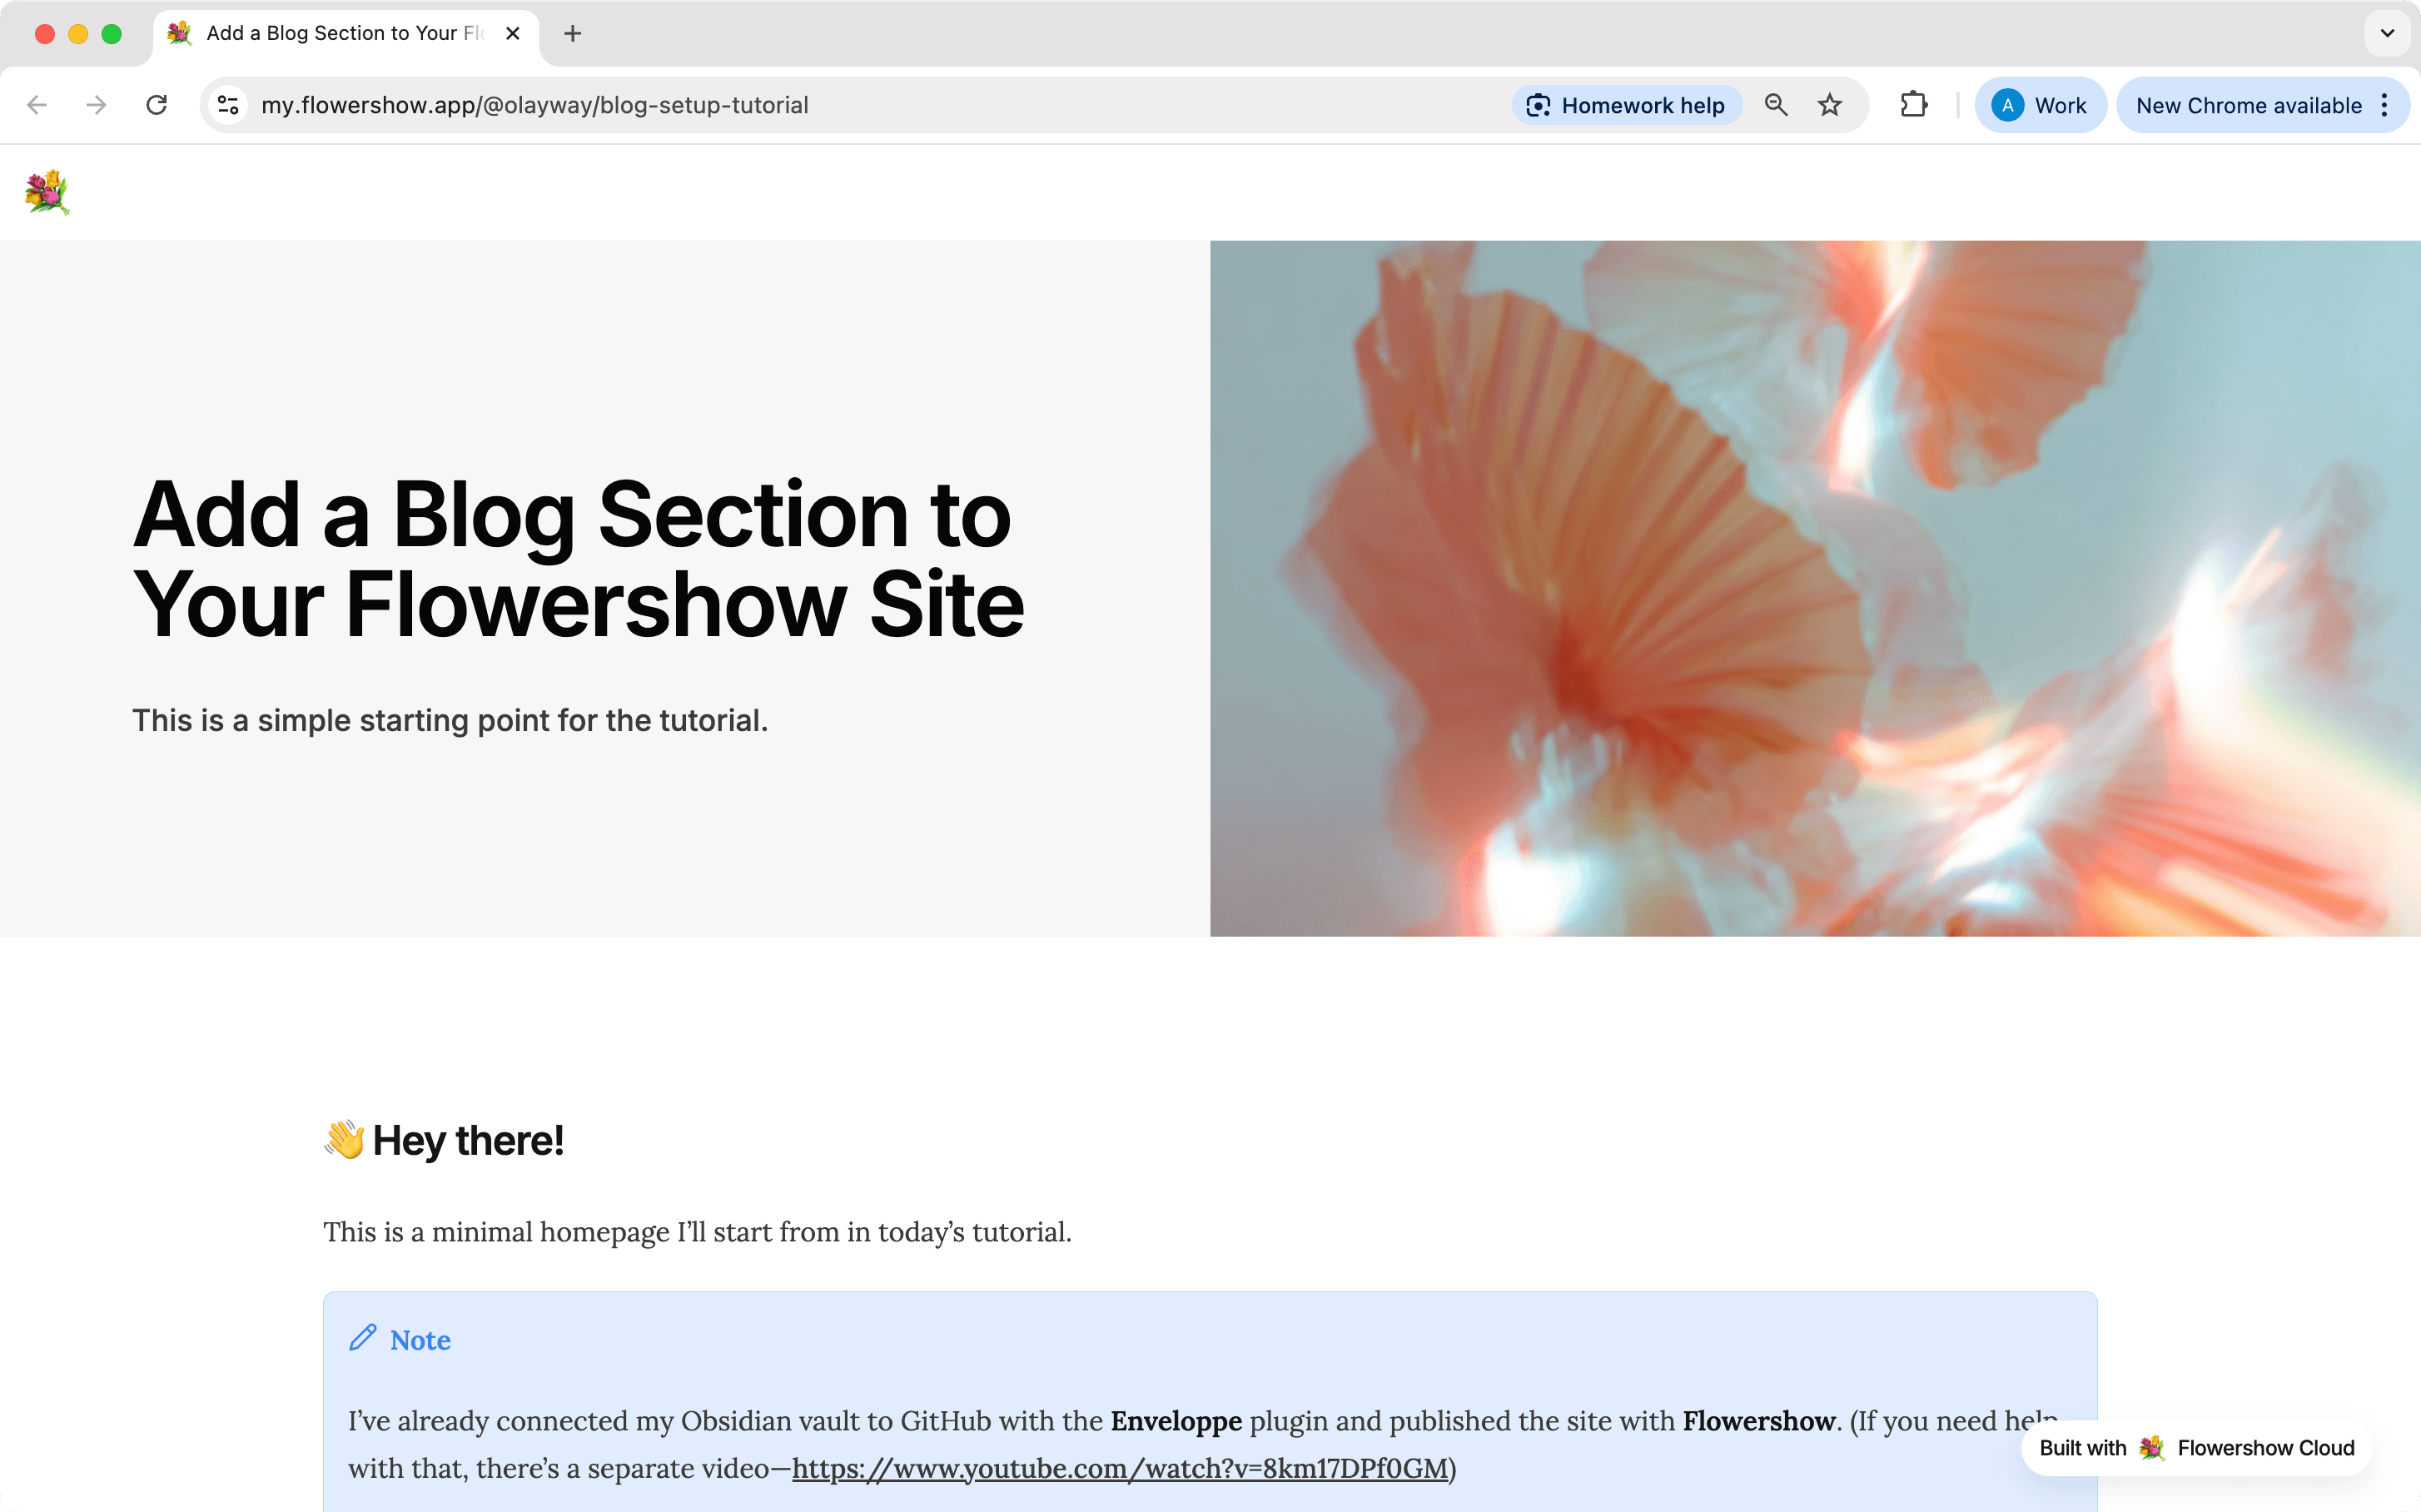
Once you’ve made changes to your files or config, remember to sync your site from the Flowershow dashboard — or just wait for it to sync automatically if you have auto-sync enabled. Your changes will appear on your live site once the sync completes.
Step 1: Create a Blog Directory
While you can name and place your blog content anywhere in your site's structure, in this guide we're going to use a /blog directory in the root folder as an example. The key is to keep your blog posts organized in a dedicated location.
- Choose a location for your blog content. Common options include:
/blog,/postsor/articles.
This folder will contain:
- Individual blog post files (e.g.,
my-first-post.md) - A landing page (
README.mdorindex.md) - Optional subdirectories for organization
You can use subdirectories to organize your posts by:
- Categories (e.g.,
/blog/tutorials,/blog/news) - Date (e.g.,
/blog/2025/06for June 2025 posts) - Status (e.g.,
/blog/drafts,/blog/archive) and then exclude unfinished work from publishing.
The blog listing automatically includes posts from all subdirectories.
In this tutorial, we’re adding the blog inside a /blog directory.
However, if your entire site is a blog, you can show your posts right on your home page: put a ```blog block in your main README.md (or index.md) and it lists everything in /blog. See Step 3.
Step 2: Add Your Blog Posts
Now, let's add some posts to our blog.
- Create a new markdown file in the chosen blog directory, for example:
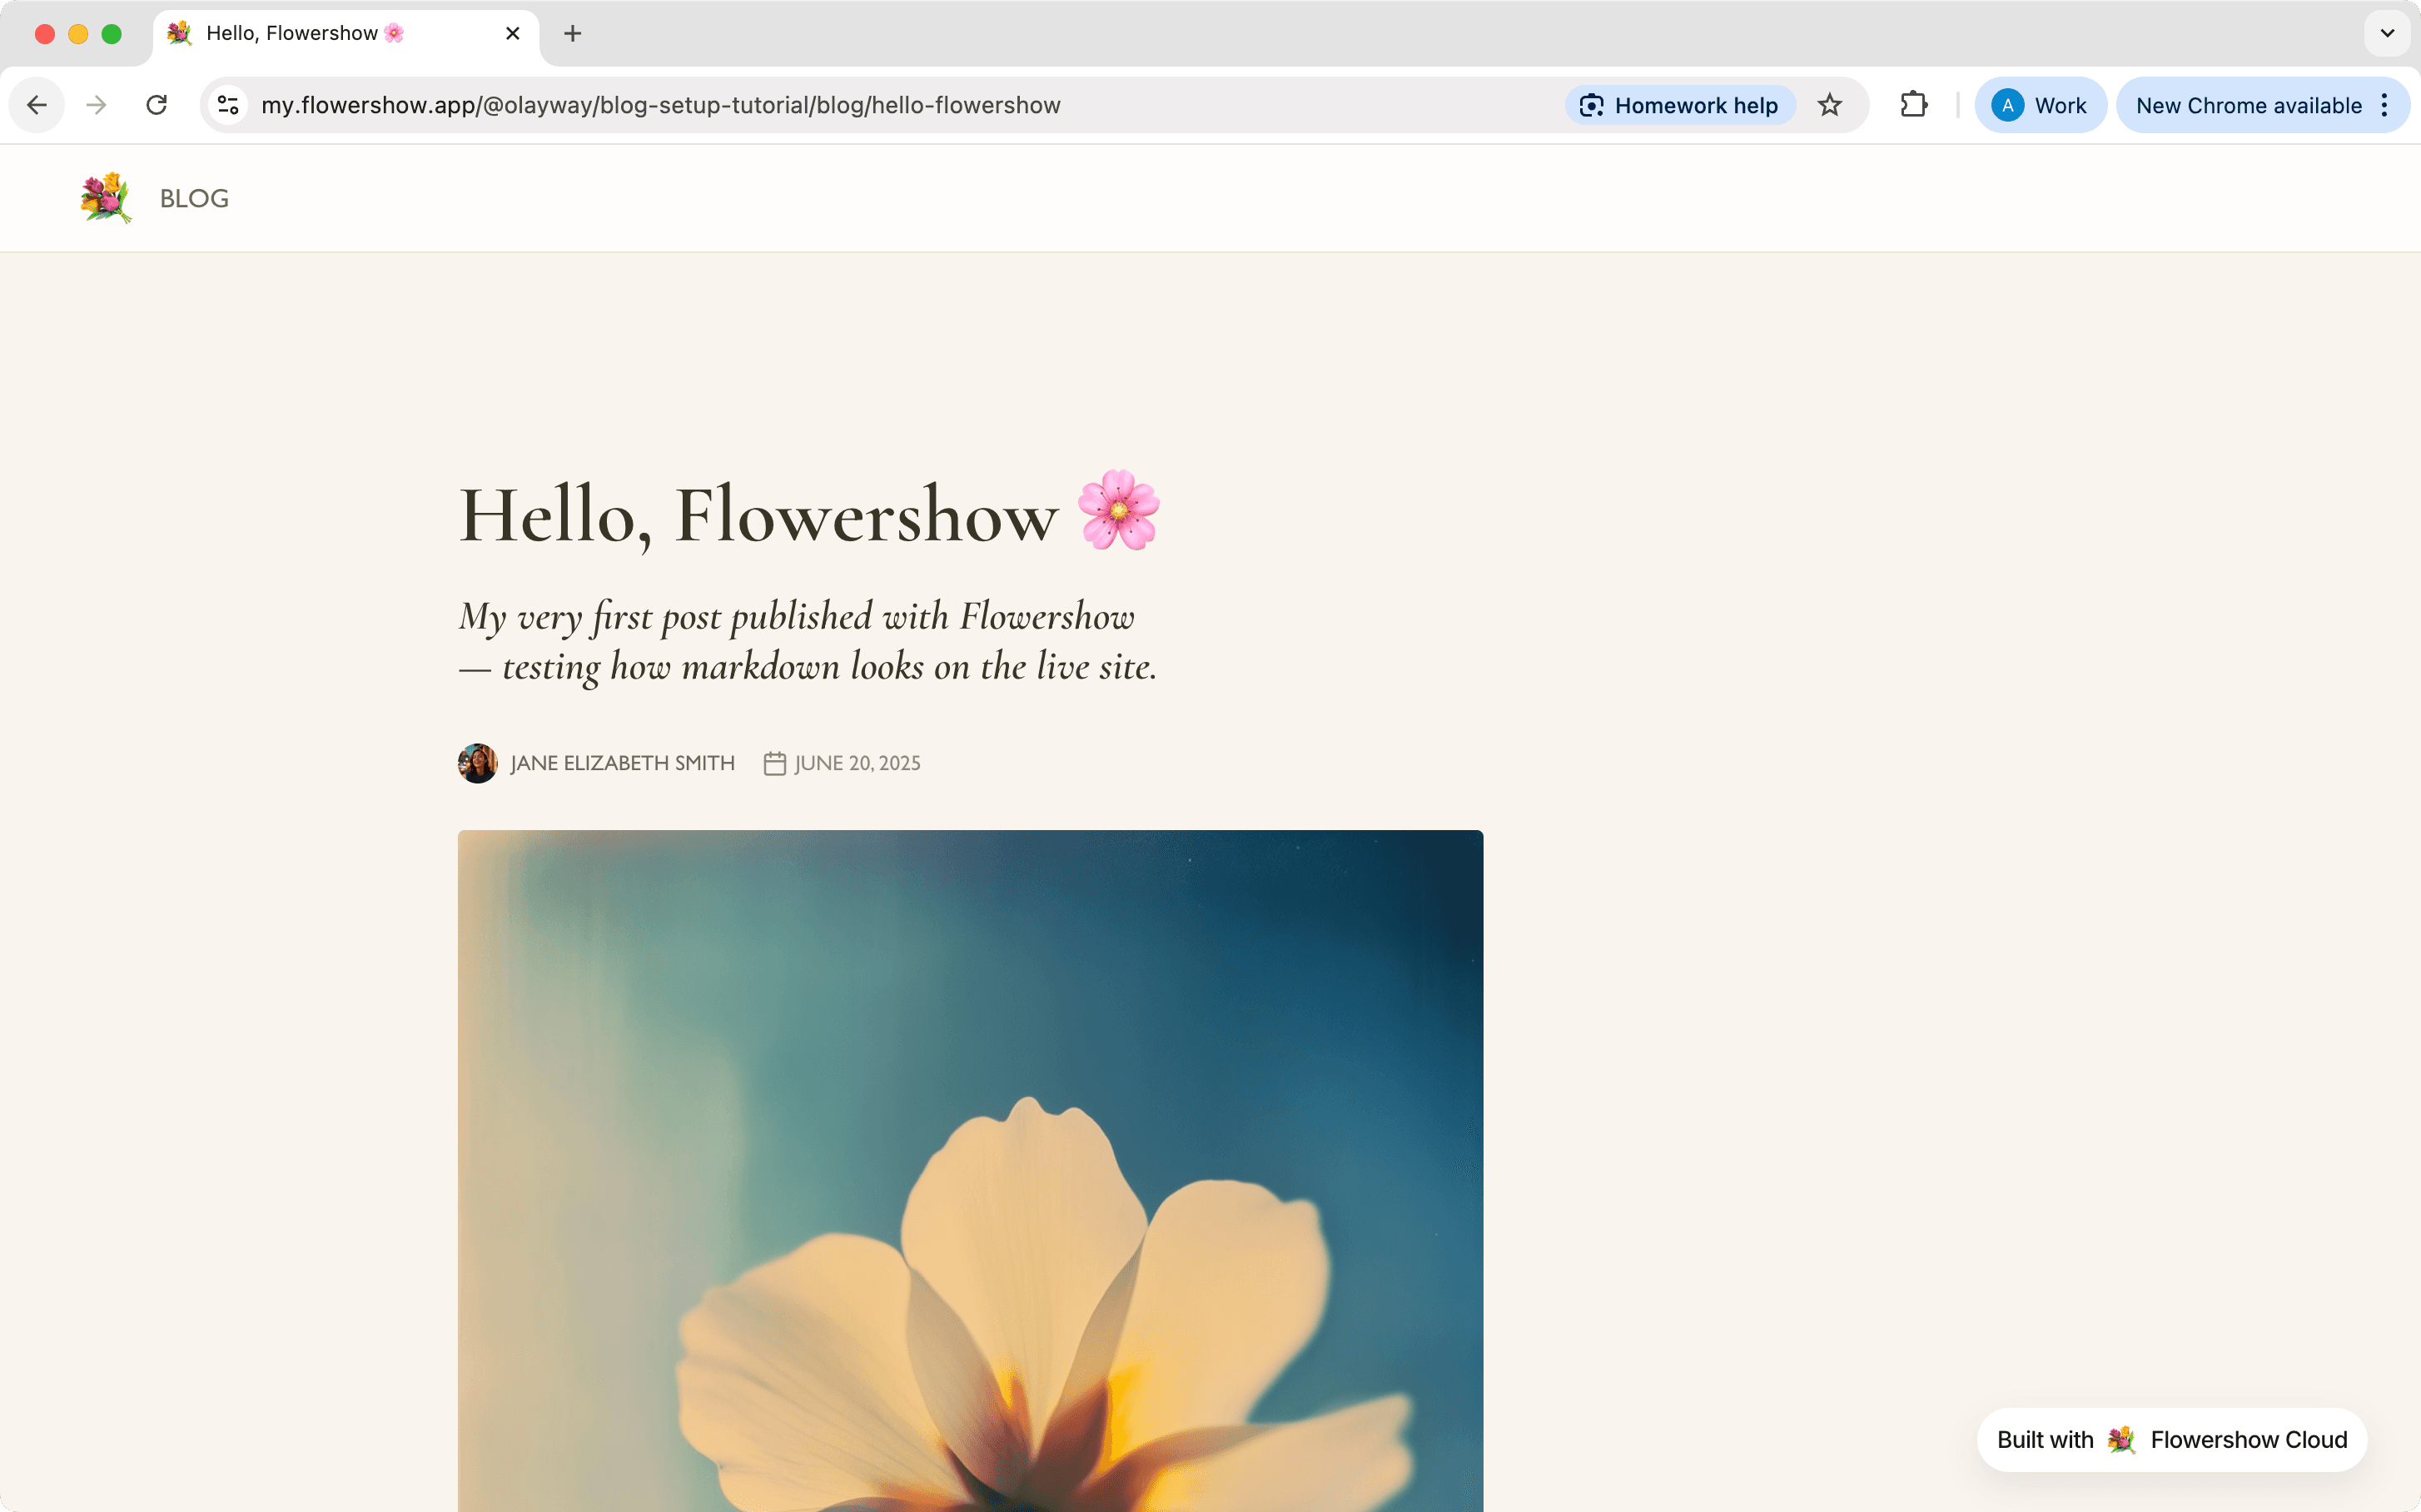
/blog/hello-flowershow.md. - Add frontmatter at the top of the file and some content below it. The frontmatter sets structured metadata of the page, and controls how your post appears in the blog listing (see next step) and page headers:
---
title: Hello, Flowershow 🌸
description: My very first post published with Flowershow — testing how markdown looks on the live site.
date: 2025-06-20
image: "[[hello-flowershow.png]]"
---

This is my first post!
Just checking how things look once rendered on the live Flowershow site.
If you can see this, everything’s working perfectly.
The frontmatter fields explained:
title: The post's titledescription: A brief summarydate: Publication date in YYYY-MM-DD format (also used for sorting)image: Wiki-link to a featured image (can also be just an absolute path or a URL), shown as the post's cover
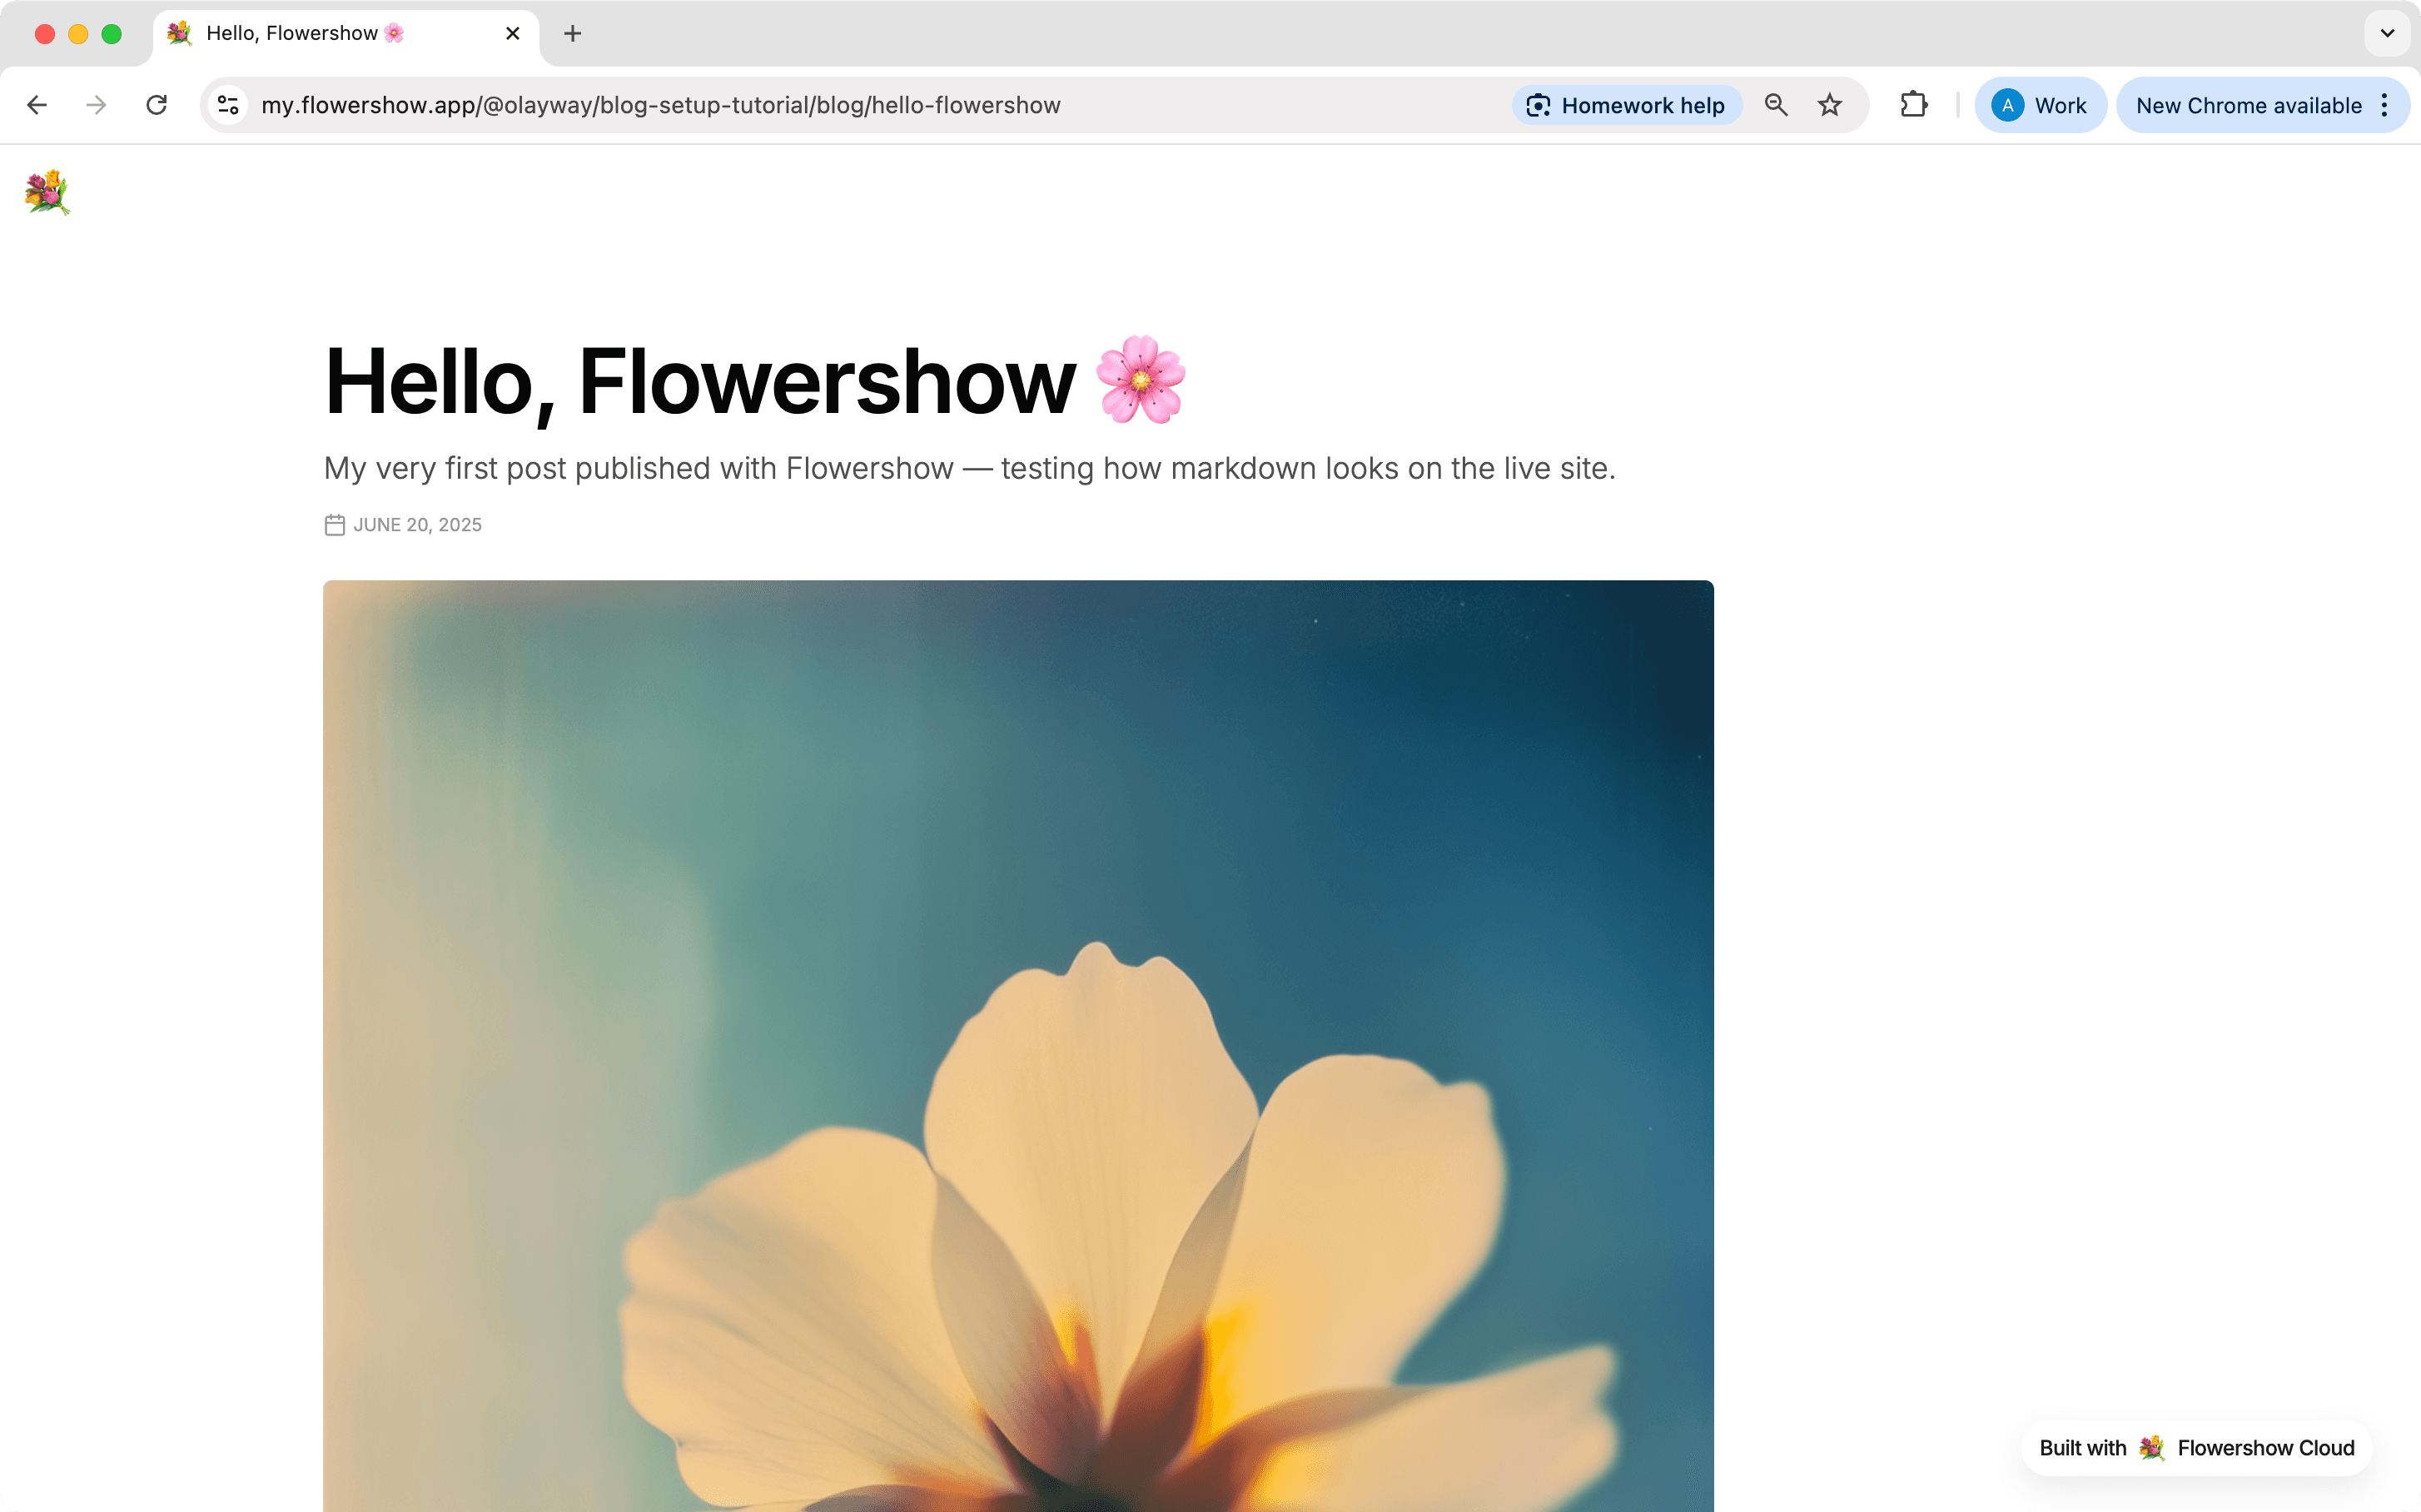
Every dated page in your blog/ folder is laid out as a post: a reading column, a big title with your description under it, the author and date, the cover image, and at the end its tags, the previous and next posts, and three more posts to read. See Post pages for what each part comes from and how to turn it off.
You don't have to use title frontmatter field to set the page title. To learn about other options, see Three Ways to Set a Page Title.
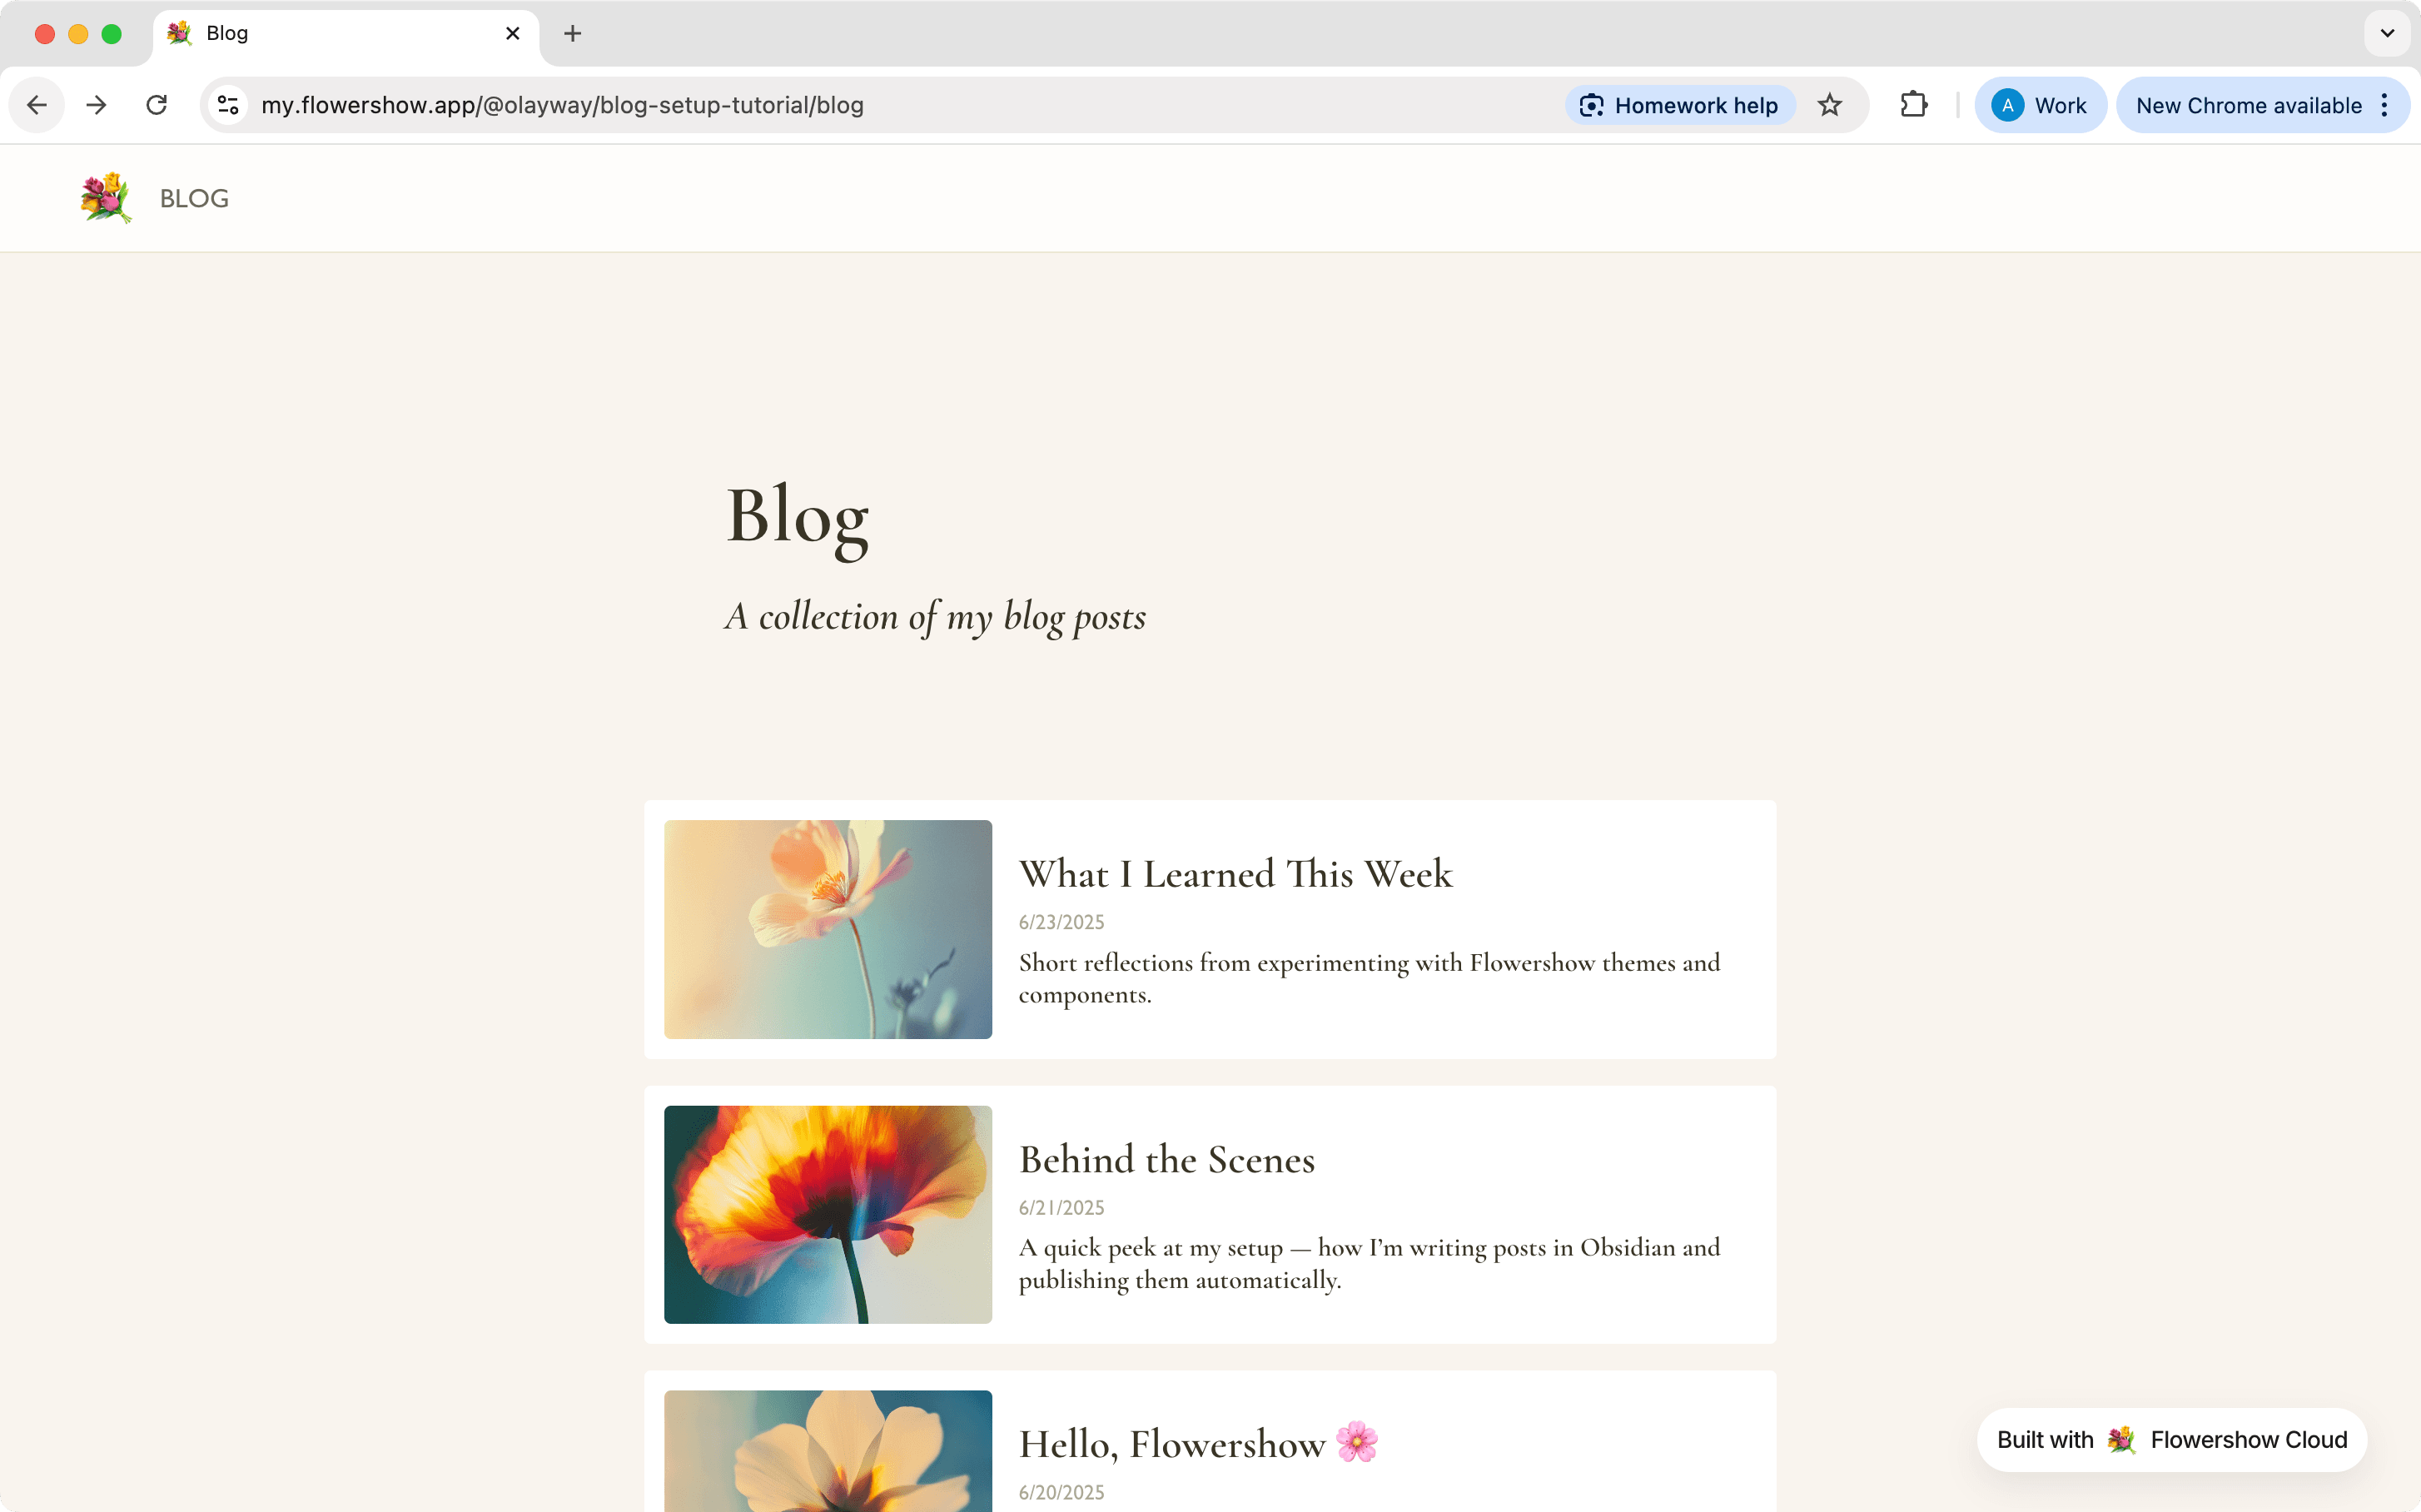
Step 3: Create the Blog Landing Page
The landing page serves as the main entry point for your blog section. Good news: if your folder is called blog or posts, you already have one.
Option A: Do nothing
Flowershow lists a blog/ or posts/ folder by itself. With no README.md in the folder, /blog shows every post in it (and its subfolders), newest first, 20 per page, with each post's title, description, image, date and authors.
Option B: Add an intro
Want a sentence or two above the list? Create /blog/README.md (or index.md) with just your prose. The list of posts appears under it automatically:
---
title: Blog
description: A collection of my blog posts
---

Notes on building things, roughly weekly.
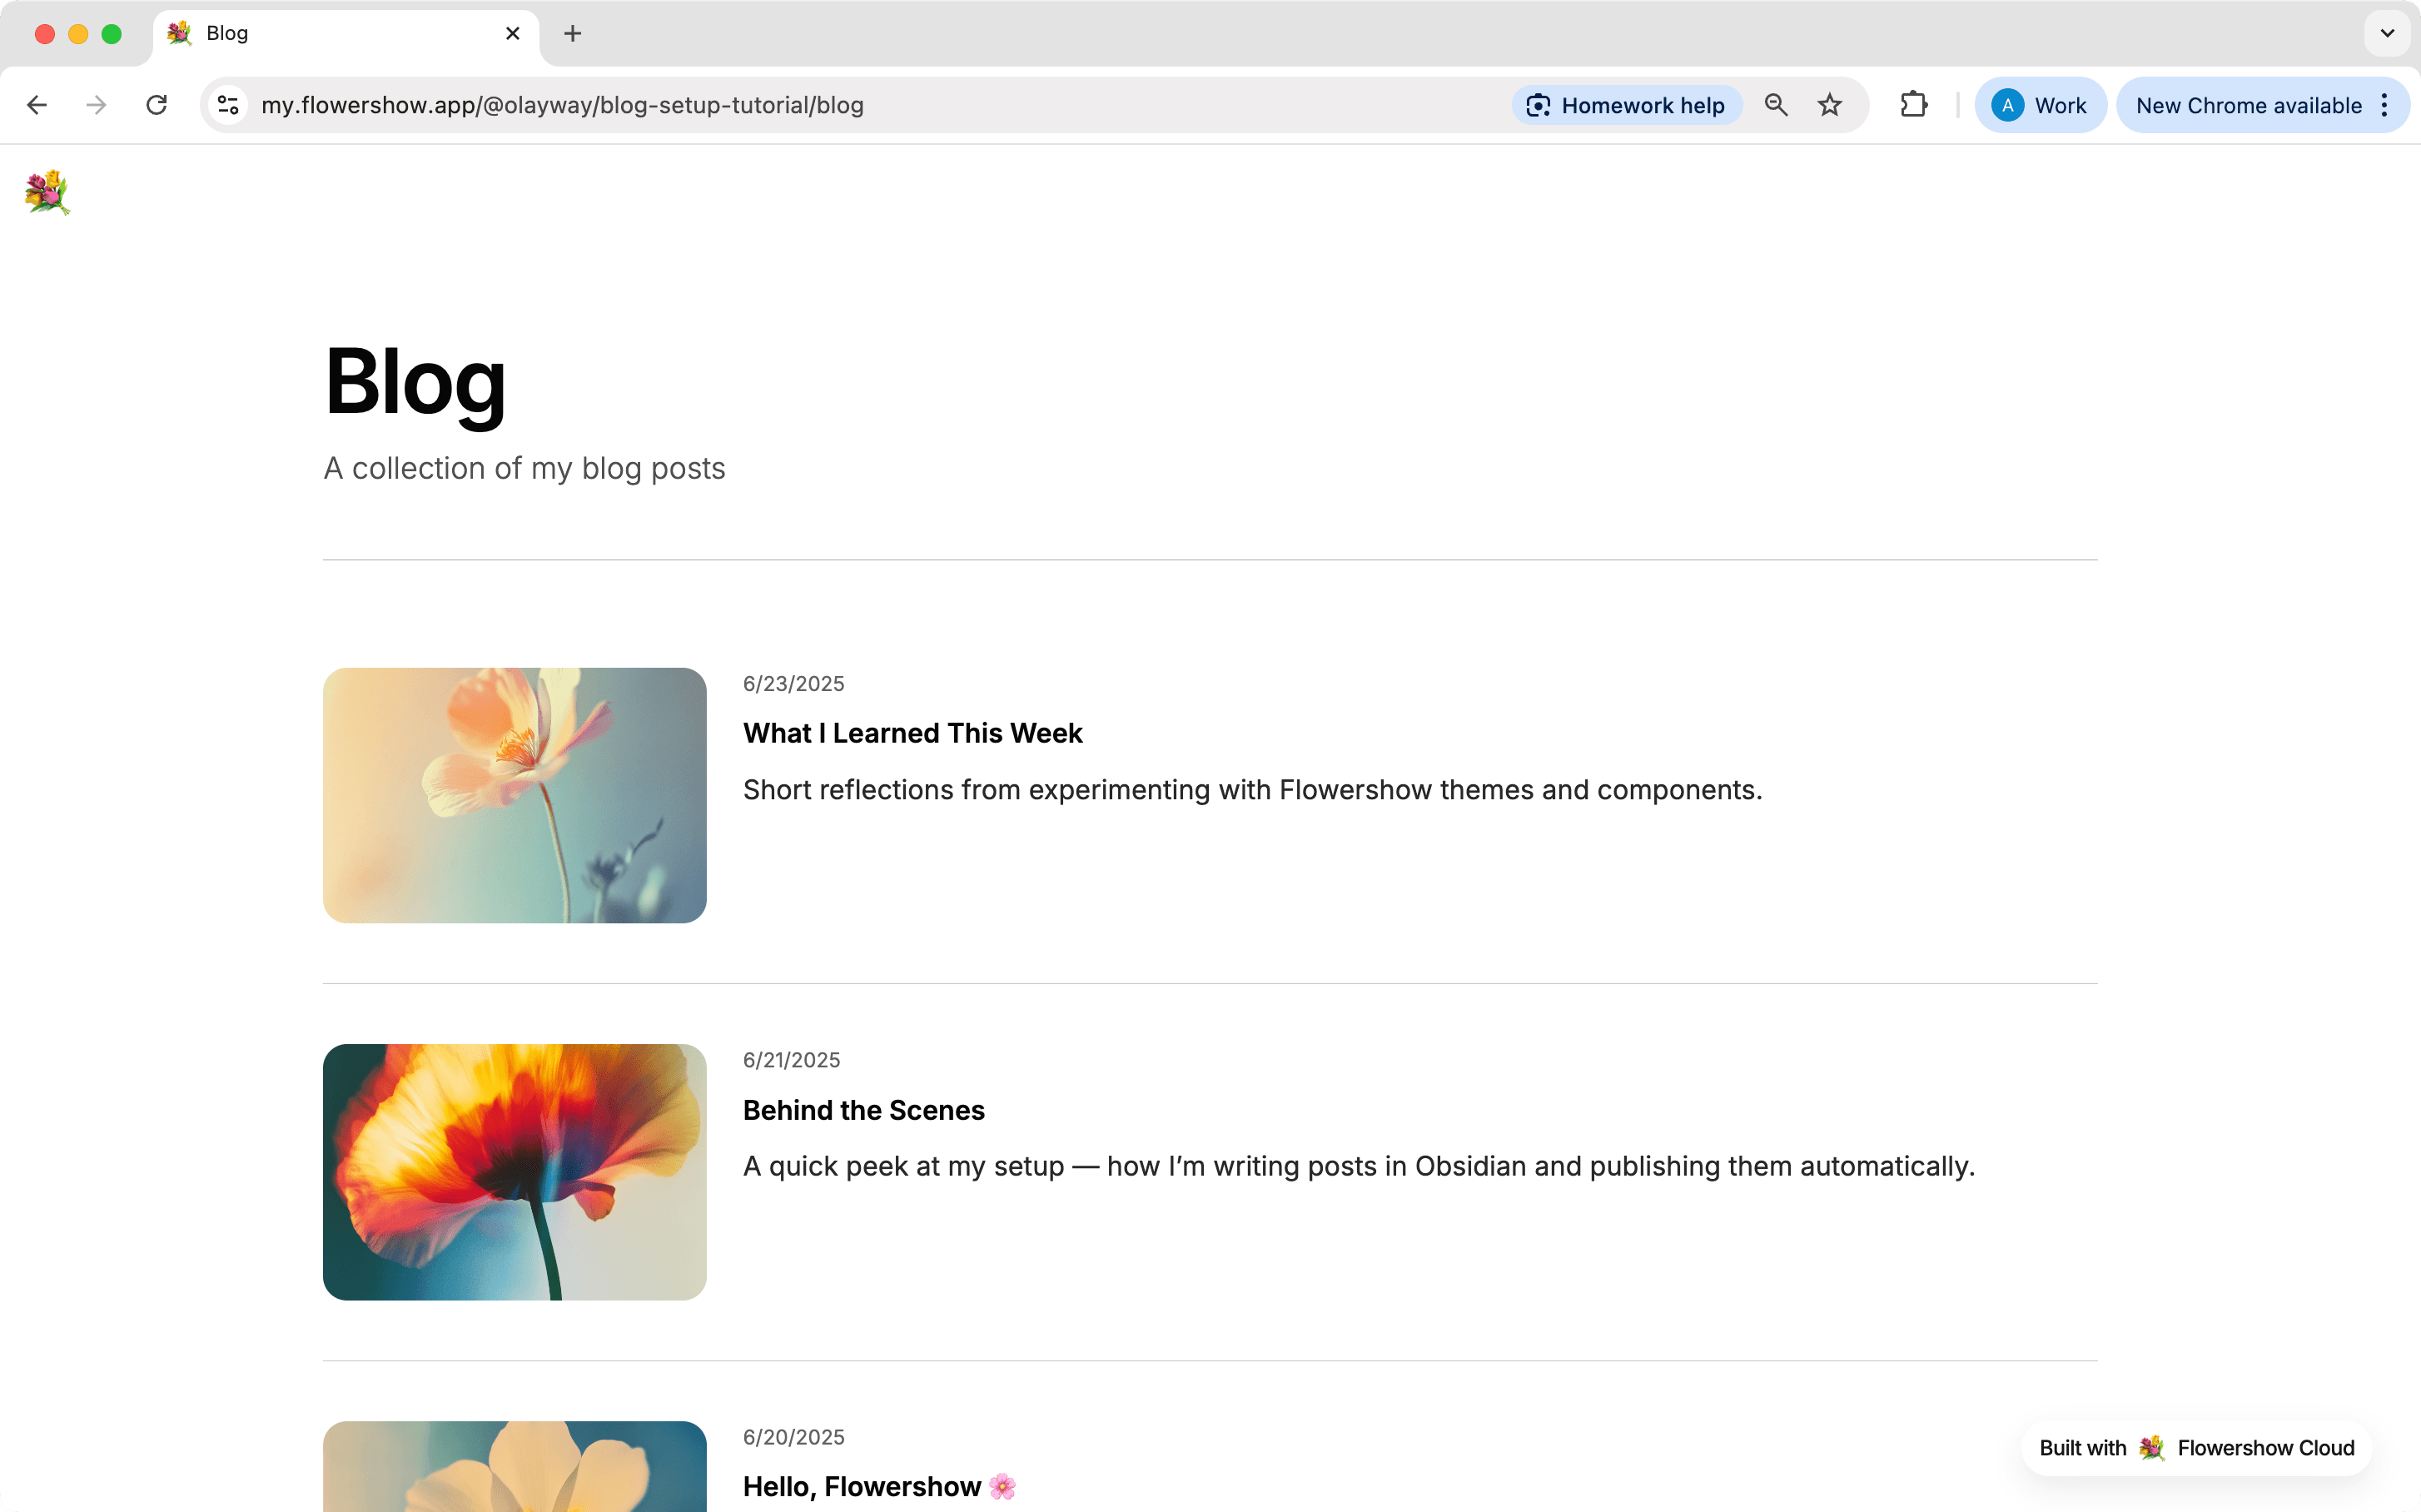
Option C: Choose how the list looks
To change the look, add layout: list and a list: map to the frontmatter. For example, a grid of cards with the latest post as a large featured hero:
---
title: Blog
description: A collection of my blog posts
layout: list
list:
  view: grid
  featured: 1
---

Notes on building things, roughly weekly.
view can be list (the default: rows with a thumbnail), grid (cards), compact (one line per post, grouped by year, great for archives) or people (portraits, for a team page). You can also choose which frontmatter fields show on each card, filter, sort, group and paginate.
Zero-config listing only applies to folders named blog or posts. For /articles or anything else, add layout: list to that folder's README.md and it lists its own folder.
Put a ```blog block anywhere on any page, such as your site's main README.md:
## Latest posts

```blog
limit: 3
```

[All posts →](/blog)
All of this is plain Markdown: it works in .md files, no MDX needed. See Listing pages for every option (views, fields, where, sort, group, pageSize, images and more).
Step 4: Set Up Author Pages
Author pages allow you to create dedicated profiles for your content creators and attribute blog posts to their authors. While this guide uses a /team directory in the root folder, you can store author profiles anywhere in your site's structure. What matters is that file names need to match authors listed in the authors frontmatter field. So you can treat author file name as an ID of this person, that you can then reference in your blog posts.
- Add an
authorsfield to your blog post frontmatter with an array of author names that exactly match their profile page filenames (without the .md extension):
---
title: Hello, Flowershow 🌸
description: My very first post published with Flowershow — testing how markdown looks on the live site.
date: 2025-06-20
image: "[[hello-flowershow.png]]"
authors:
  - jane-smith
---
-
Create a directory for profile pages, e.g.
/team. -
Create profile pages for your authors. For example:
team/ ├── jane-smith.md └── README.md # Optional index page listing all authors -
Create an author profile, e.g.,
team/jane-smith.md:
---
title: Jane Elizabeth Smith
avatar: "[[jane.png]]"
---

Jane is a passionate technical writer with over 5 years of experience...
The author pages support all the basic metadata fields, like title, description, date, or image. In this case, we're use title for the full name of the author. Additionally, we can add avatar frontmatter field for a picture displayed in page headers next to the author name.
When an author page exists, the author's name in blog posts will automatically link to their profile page and display its content.
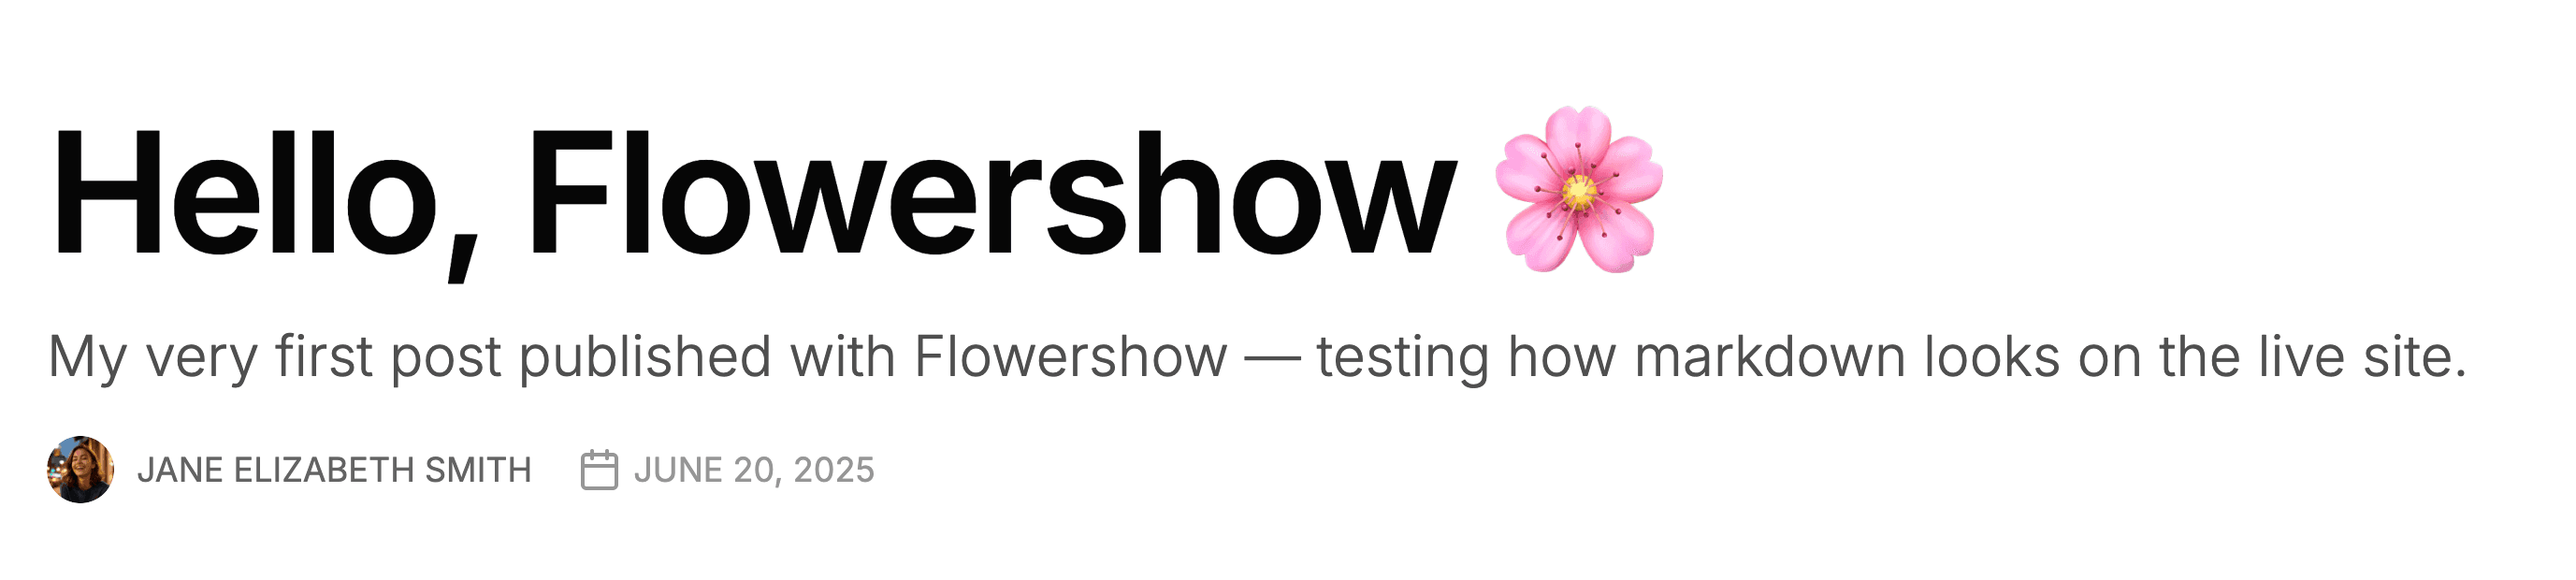
Use simple, URL-friendly names for author page files (e.g., jane-smith.md) and set the full name in the title field. Then use the file name as an ID in the blog post frontmatter (e.g., authors: [jane-smith]).
For more details about author pages, profile customization, and avatars, see How to Show Authors of Your Content in Page Headers.
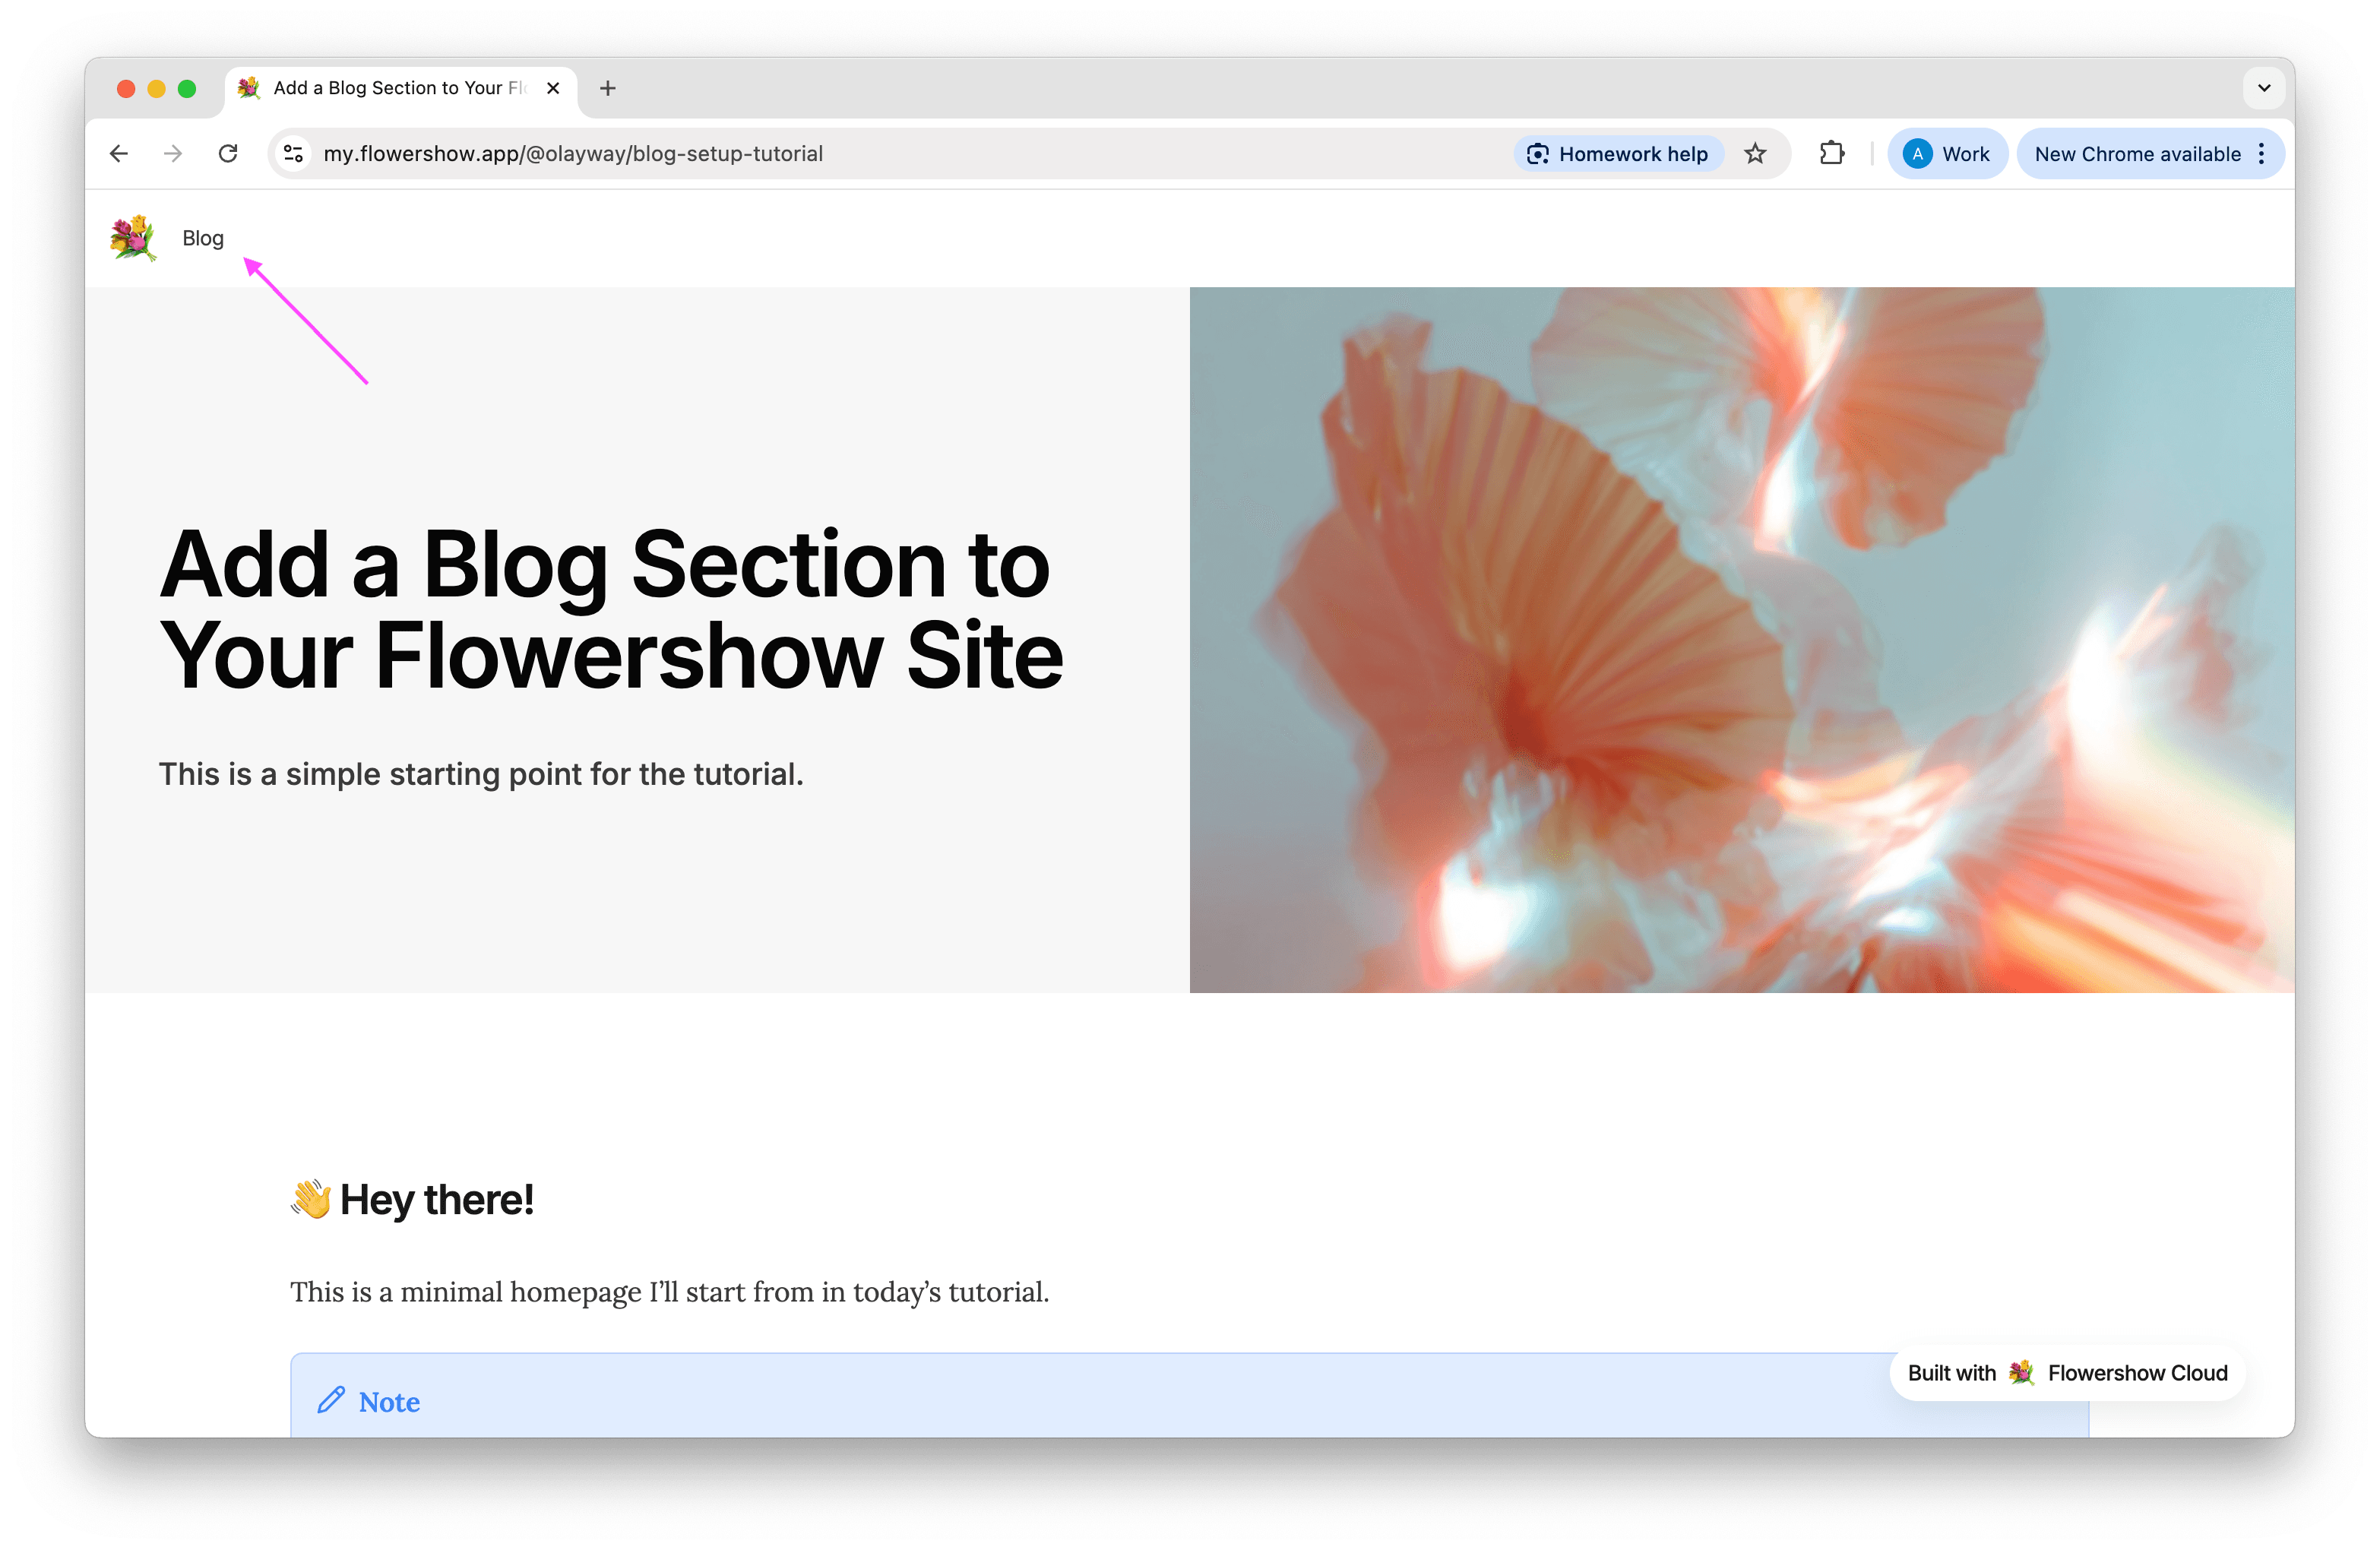
Step 5: Add Blog to Navigation
- Open or create
config.jsonin your site's root directory - Add a blog link to the navigation:
{
  "nav": {
    "links": [
      {
        "href": "/blog",
        "name": "Blog"
      }
    ]
  }
}
For more details about customizing your navigation bar, including adding logos and social links, see Navbar configuration.
Step 6: Control What Gets Published
You can control which blog posts get published using either site-wide settings or page-level control:
Using site-wide settings
Add contentExclude to your config.json to exclude entire directories:
{
  "contentExclude": ["/blog/drafts", "/blog/archive"]
}
Using page-level control
Add publish: false to a post's frontmatter to prevent it from being published:
---
title: Draft Post
description: Work in progress
publish: false
---
This is useful for:
- Keeping draft posts private
- Archiving old content
- Managing work-in-progress posts
For more details about controlling which files get published, including advanced configuration options, see Content Filtering.
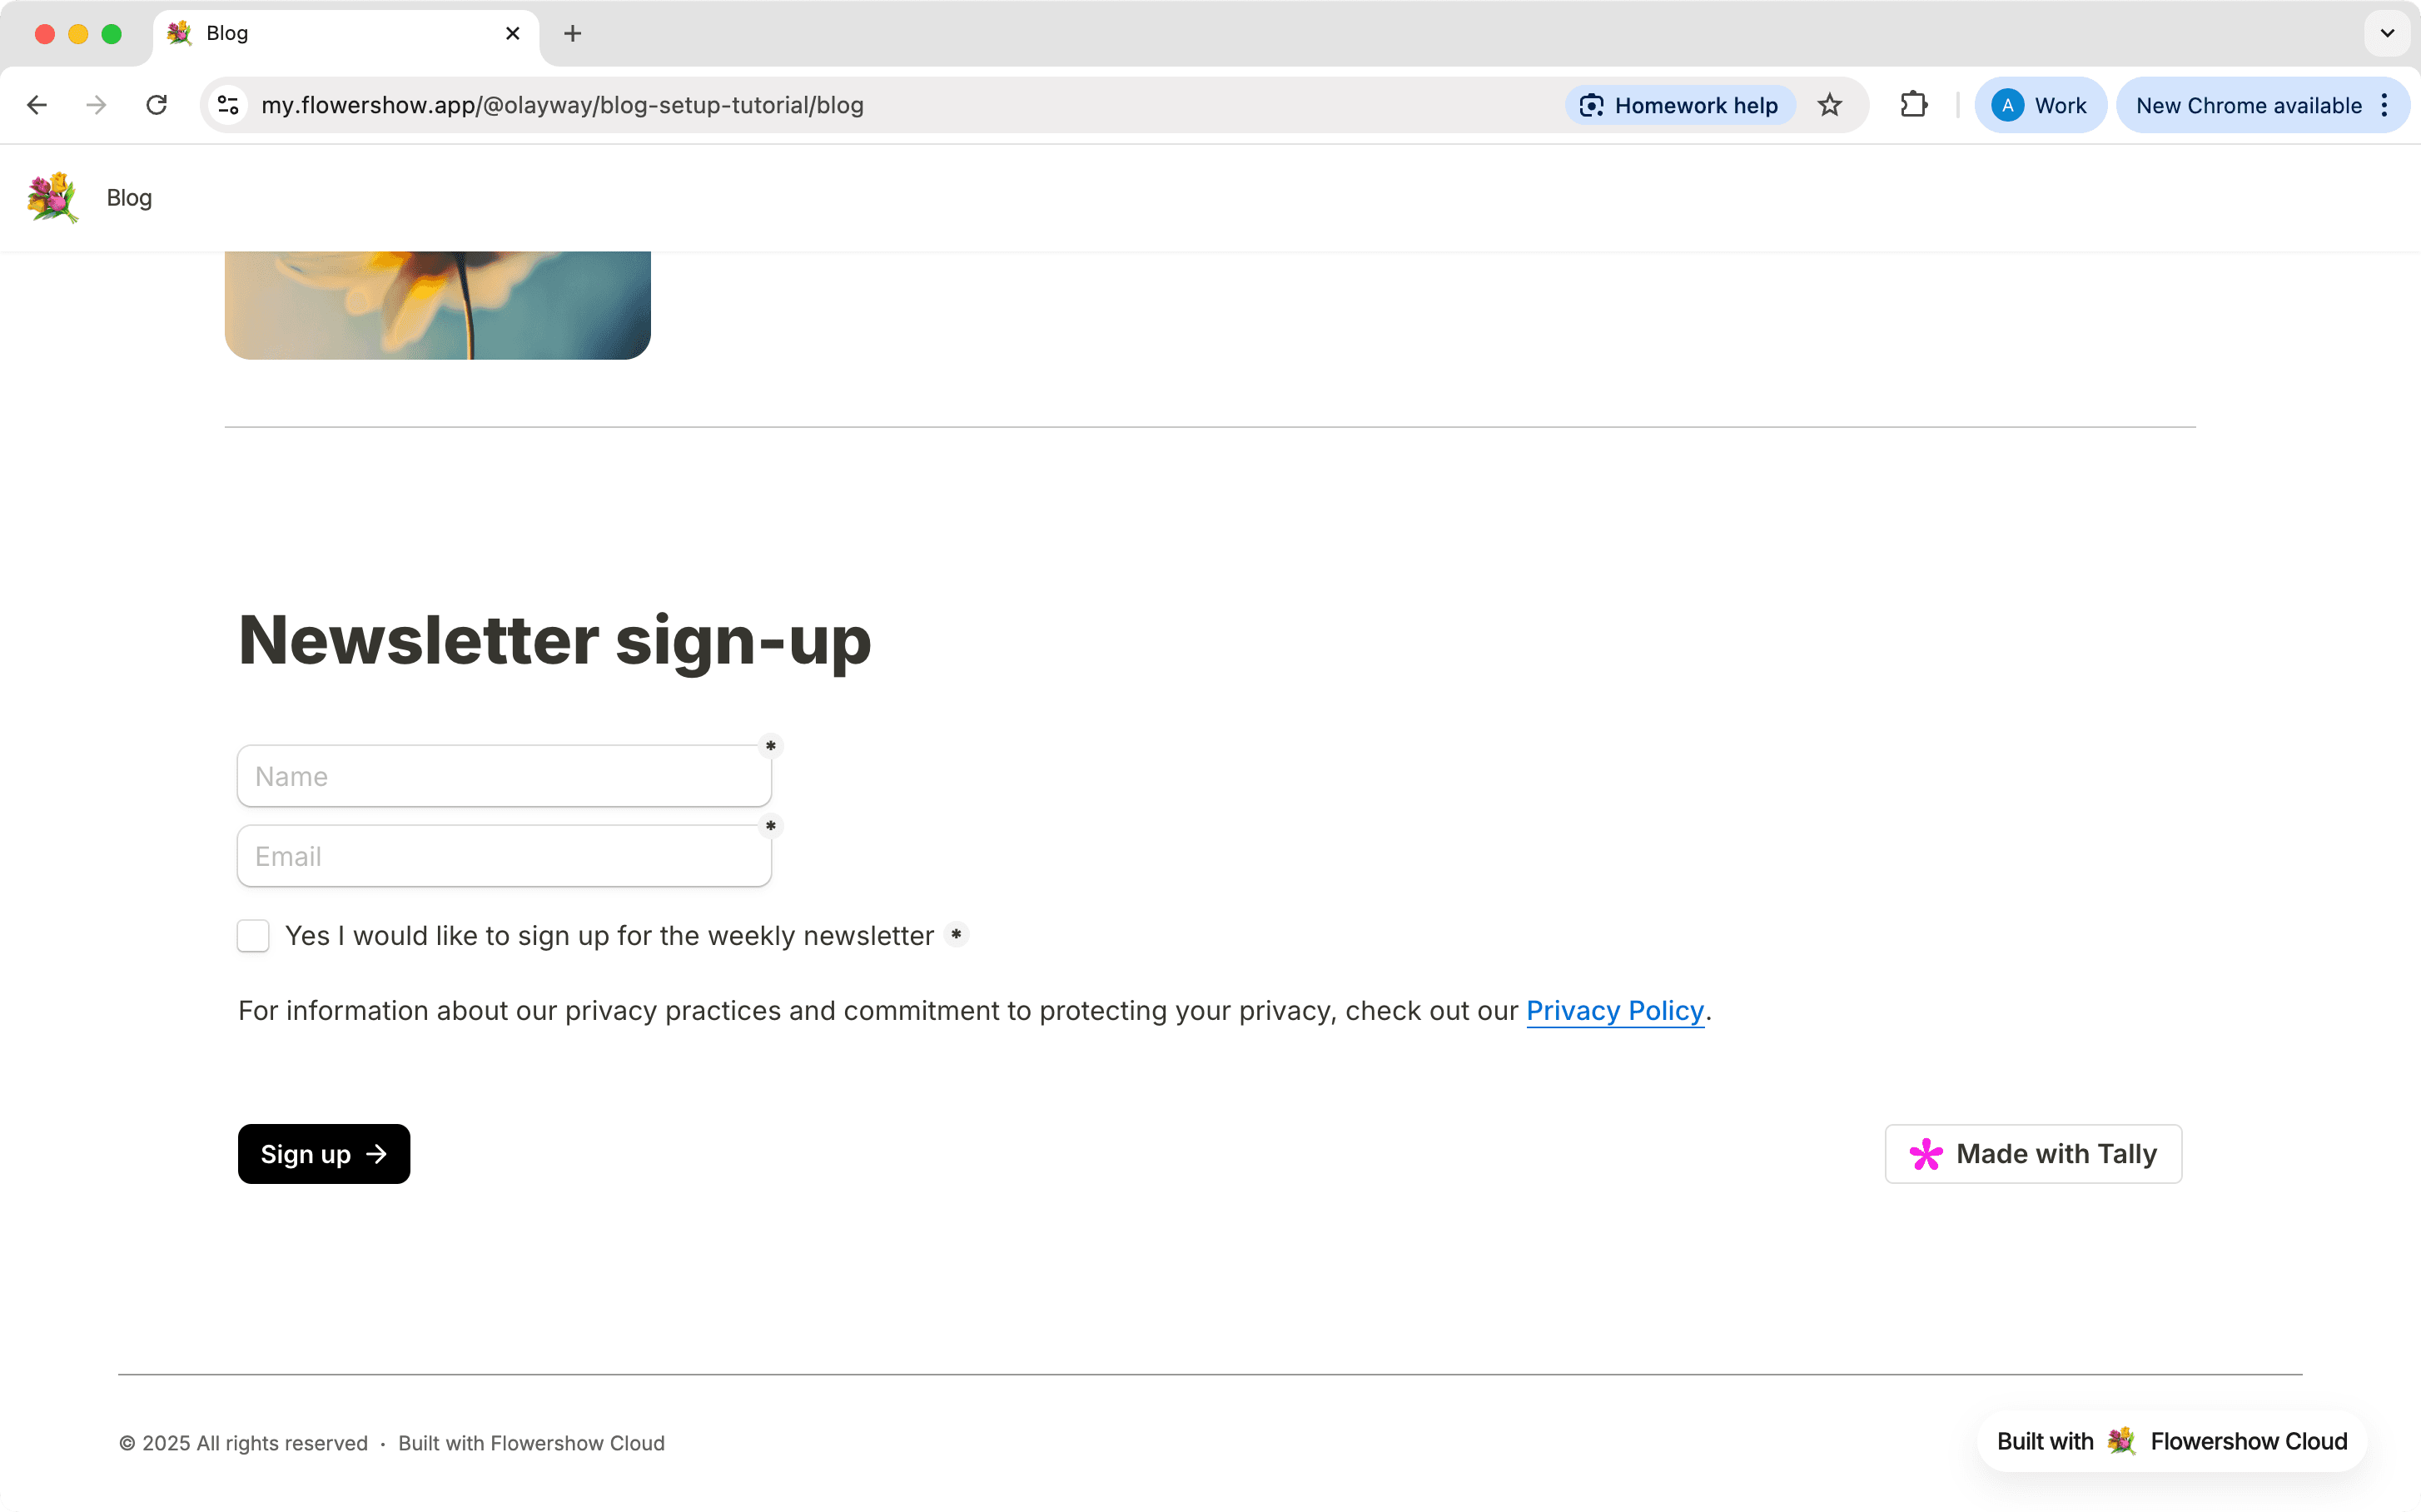
Step 7: Embed a Subscription Form
To let readers subscribe or contact you, you can embed newsletter forms directly in your markdown files.
If your form provider gives you a simple <iframe> snippet, you can paste it directly. For embeds that also include a <script> loader (like Tally or Mailchimp), put the loader in Custom Head Code and keep only the iframe in your page.
Add the loader once in Site Settings → Analytics → Custom Head Code (or config.json):
{
  "head": "<script defer src=\"https://tally.so/widgets/embed.js\"></script>"
}
Then drop the form into your post:
<iframe data-tally-src="https://tally.so/embed/your-form-id"></iframe>
Learn more in How to Add Newsletter and Other Subscription Forms.
Step 8: Apply a Theme
Finally, let’s make it beautiful. Flowershow supports official CSS themes from the flowershow/themes repository. In your site’s config.json, you can set the theme like this:
{
"theme": "lessflowery"
}
For more details about using official Flowershow themes, see Official Flowershow Themes.
![tip] You can also create a custom theme! You can also style your site yourself by creating a
custom.cssfile in the root of your site. To learn more, see How to Customize the Style of Your Site.
Wrapping Up
🎉 That’s it — you now have a fully working blog on your Flowershow site, complete with:
- Organized posts
- Dynamic listing page
- Author profiles
- Navigation
- Draft control
- Subscription form
- Custom theme
Whether you write in Obsidian, another markdown editor, or straight in GitHub, your workflow stays simple — just edit markdown, commit, and Flowershow takes care of the rest.
If you’d like to see all of this in action, check out the full video tutorial linked above.
Happy blogging with Flowershow!
